If your dentist has recommended a dental crown, you may be wondering what the procedure involves and what will happen during your appointment. Crowns are commonly used to protect damaged teeth, restore strength after decay or fractures, and improve function and appearance. Understanding how a tooth is prepared for a crown can help you feel more confident and comfortable before treatment begins.
Step 1: Examining and Numbing the Tooth
Before any work starts, your dentist will carefully examine the tooth and surrounding area. X-rays or digital images may be reviewed to check the health of the tooth roots and supporting bone. This helps ensure that a crown is the right solution and that no additional treatment is needed beforehand.
Once everything is confirmed, the area is numbed with a local anesthetic. This keeps you comfortable throughout the appointment, and most patients report feeling only pressure or vibration rather than discomfort during the procedure.
Step 2: Shaping the Tooth for the Crown
To make room for the crown, your dentist will gently reshape the tooth. A small amount of enamel is removed from the top and sides so the crown can fit securely over it without feeling bulky or altering your bite.
The amount of reshaping depends on the type of crown and the condition of the tooth. If the tooth has significant damage or decay, your dentist may first rebuild weakened areas with a filling material to create a stable foundation for the crown. This ensures the final restoration is strong and well-supported.
Step 3: Taking an Impression or Digital Scan
After the tooth is shaped, an impression or digital scan is taken. This records the exact size, shape, and alignment of your prepared tooth, as well as the surrounding teeth and bite.
This information is used to create a custom crown that fits comfortably, blends with your natural smile, and functions properly when you chew and speak. Your dentist will also help select a shade that closely matches your surrounding teeth for a natural-looking result.
Step 4: Placing a Temporary Crown (for Traditional Crowns)
If your crown is being made in a dental lab, a temporary crown is typically placed to protect the prepared tooth while the permanent one is being crafted. The temporary crown helps maintain your bite, prevents sensitivity, and keeps the tooth safe from damage.
Your dentist will provide instructions for caring for the temporary crown, such as avoiding sticky or very hard foods and being gentle when brushing and flossing around the area.
Once the permanent crown is ready, you’ll return for a short follow-up visit, where the temporary crown is removed and the final one is placed and adjusted for comfort.
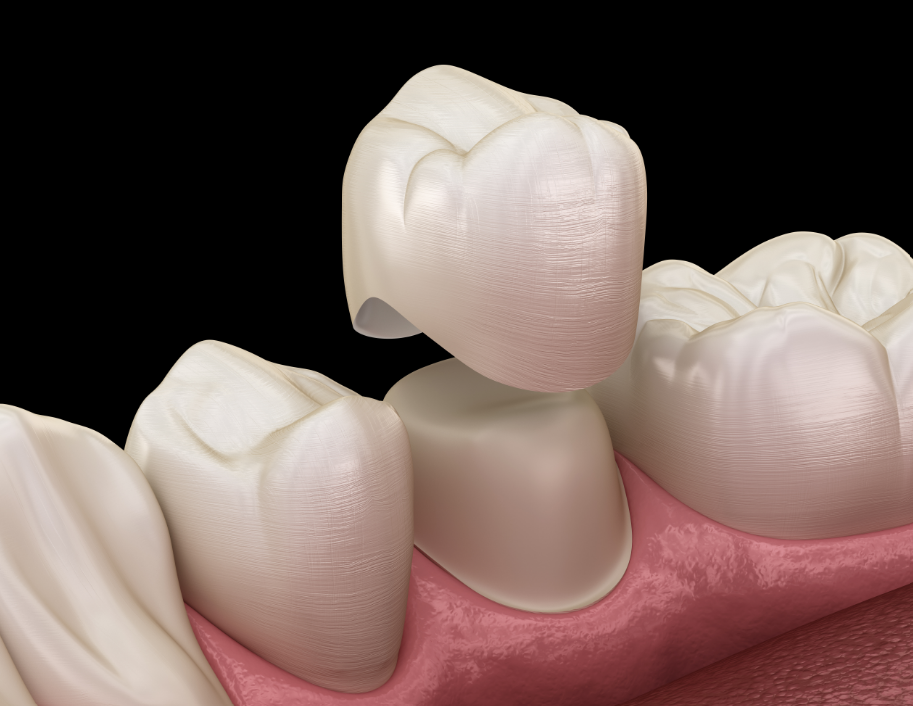
Step 5: Checking the Fit and Final Placement
When it is time to place the permanent crown, your dentist will check its fit, shape, and color before cementing it in place. Minor adjustments may be made to ensure your bite feels natural and comfortable.
Once bonded, the crown becomes a strong, durable part of your smile and can last many years with proper care. A well-prepared tooth sets the stage for a strong, long-lasting crown.
About the Practice
Jupiter Family Dental is dedicated to providing compassionate, patient-centered dental care in a welcoming and supportive environment. Our practice is led by Dr. Chung Chien Hsia, who believes that dentistry has the power to truly change people’s lives. He is passionate about helping patients feel confident in their smiles, relieving dental discomfort, and restoring long-term oral health through thoughtful, individualized treatment. Dr. Hsia takes time to listen, educate, and build trust so every patient feels comfortable and cared for throughout their visit. At Jupiter Family Dental, the team prioritizes comfort, communication, and quality care for every member of the family.
Call us at (214) 432-1133 or request an appointment online.